Showing posts with label baby. Show all posts

Newborns In Need

Thursday, September 6, 2012

*Warning: This article introduction contains a bit of baby-birth-story information though I attempted to keep it tame.*

Goodness, this picture was taken four and a half years ago. It seems so long ago, yet I remember seeing my baby in that little incubator box, with tears in my eyes, like it was just moments ago. Little Miss surprised us all by coming early. She was a robust premie if you can even put those two words side by side. 5 pounds, 5 ounces. A tad more than 35 weeks.

I started bleeding in the morning and we wound up in the hospital, checked-in, by early afternoon. Four hours into labor, as the nurses outside our door were casting lots to see if we would end up in the OR for an emergency c-section. But Little Miss made her appearance there in that delivery room.

She seemed tiny. They took her first. She was breathing okay. After a bit she went to her daddy because I kept bleeding. The placenta delivered and we realized the abruption was more grave than we had seen on the ultra sound earlier. She and I were very lucky to still be here.

We went home after a few days, only to come back to the hospital for photo-therapy. Routine. Her brother had the same thing. Then the nurses found she was cold. Very cold. Whispering they rolled her little incubator away from us and out the door. Blood tests. IV lines. Spinal taps. Twice attempted. So many wires. Tubes. Beeping. They didn't know why her body was so cold. We felt worried. We felt empty scared.

She was admitted to NICU. And we had to go home.

We traveled an hour each way to visit our tiny daughter every day. We held her, tape, tubes, lines and all. We prayed, we talked to her, we rocked her...and we cried a lot.

She didn't have anything wrong with her. Her brain had just decided to not warm her little body. She only stayed a week and came home to us in the baby seat her brother had used.

We realized she needed premie clothing. Regular newborn size fanned out on her like flippers. She needed premie diapers. Newborn diapers fell down off her bottom. She needed premie everything. And we realized we needed a premie mindset and a premie heart to get through that time and then all the ups and downs that can come from being born a bit early.

My husband and I were so very lucky. We were surrounded by so much love, support, and compassion from the nursing staff, friends, and our families. We feel lucky that God led us through. He held our hands and walked right beside us when we needed it the most. And he blessed us with the wonderful soul Little Miss is today.


As I watch my premie-girl grow, I think about the babies born to so much less. Who is watching out for their needs? Who is helping mothers struggling? Sometimes no one. I ask myself, can I help? Can I be that one to support a baby? A new mother? In my heart, I know I am being called by God to do just that, help others in need. 
*          *          *

NINLogo0308

Newborns In Need (NIN) is a 501(c)(3) non profit organization with chapters across the country. NIN is dedicated to bringing love, support, and living essentials for babies born to poverty, especially the tiniest, who are born prematurely. Through NIN’s specific initiative, Sophie’s Place, special volunteers help give comfort to families grieving for their little one who did not survive. Donated clothing, formula, diapers and other essentials are distributed through local chapters to area agencies, hospitals, and shelters.

And now the bit for you the crafter...here is how you can help right now. NIN also greatly appreciates donations of fabric, thread, quilt batting, yarns and ribbons. Chapter Volunteers meet monthly to cut, sew, knit and crochet blankets for local babies who have little else. Please check their website for the specific types of materials they accept before making your donation. Send your donation to your local chapter, and sign up to be a volunteer to start making a difference.

If you feel compelled to give, visit their website to learn more about their other initiatives serving the needs of newborns across the country.


 If you liked this article and you want to see more, subscribe to 
Abbie Living to continue getting tips, tricks and thoughts about sewing, knitting, and crafting to create a better world.

Thank you for visiting! Hugs and prayers ~ Abbie

Hot Air Balloon Pocket Pillow with Pattern and Tutorial

Wednesday, April 18, 2012

HotAirBalloonPillow3 
Now that was a long title! I just wanted to get all the highlights into one place. First, this is a cute pillow pattern that has a pocket. The pocket just happens to be the basket for a small friend to ride in. And, this basket is attached to a beautiful hot air balloon.

And of course since I am crazy, and like writing up tutorials, especially complex ones like this one, and posting them for free access, this project comes with a self-drafted pattern and complete instructions! Enjoy!

A couple of notes first:

* I'd say a very advanced beginner sewer should attempt this. (That being said, for ambitious beginners with a passion for learning new skills, this is a great project to explore sewing curves.) Those of you out there who have far more sewing experience than that, this should just be a fun project.

* What do I mean by advance beginner? You'll need to be able to sew curved seams that lay flat, or at least have the time to try them out, (you'll be glad you did) and you'll need to be familiar with pattern notations. There are quite a few curves in this project and some involve more easing than others. I give a number of tips about doing these curves here in this tutorial, but for more learning and a visual, Google drunkards path quilting, or sewing curved quilt seams videos.

As for pattern notations, you'll need to be able to transfer pattern notations and follow my instructions about how to use them.

*I am not a quilter. I am a garment maker. So, this patchwork-style project is just that...a "style" project. Some parts are patch-worked together because I designed a single layer of fabric for the pillow facing. Some of my methods are a little non-traditional when it comes to true quilt-patchwork, but bear with me. The project turns out lovely in the end.

* And finally, this pattern transports a small friend who is approximately 3" wide by 6" tall. Or, it could carry a gift card to your favorite baby gear store too.

* I am making this particular pocketed pillow for a friend who is having a baby, VERY soon. I guess the pillow is really for the baby, not the friend, but you get what I mean. Anyway, this little soft accessory makes a great baby shower gift and when constructed from quality cotton fabrics, is also a sweet heirloom-type gift. I hope my recipient likes it very much!

Materials:
Hot Air Balloon Pillow Pattern download here
Computer and printer
Paper scissors
Disappearing ink pen and a pencil
Use quilting cotton, or another such light fabric in a natural fiber
    1/4 yd to be the sky
    1/4 yd for the balloon
    1/4 yd for the basket
    4" X 8" scrap for the ropes
    1/2 yd for the back pillow panel
Ruler (a quilter's ruler is helpful)
Slide ruler (nice, but not necessary)
Straight pins
Fabric scissors
Matching thread
Sewing machine
16" X 16" pillow form

How To:

1. Wash, dry, and press fabrics.

2. Download and print pattern pieces. Cut them out with a paper scissors.

3. Align grain line of pattern pieces to the grain line of the fabric (they should run parallel), trace around each piece with a disappearing ink marker (or other writing implement of your choice) and transfer all pattern marks with a pencil to the right side of the fabric.
DSC_1312
HINT: This is how I transfer pattern marks that are not along the edge of the pattern piece. I simply, fold back the paper pattern at the notation and mark with a pencil this spot on the topside of the fabric. If your paper isn't transparent, you could use a straight pin. With the pattern piece flat against the fabric, push the pin tip through the pattern paper into the fabric below. Lift the paper pattern and mark the dot where the pin is sticking into the fabric below.

Some pattern pieces are meant to be cut on the fold, so watch out for this (these pieces are noted as such on the patter pieces themselves.) Remove pattern pieces and cut the pieces out with a fabric scissors. (If you'd rather print the pieces, trace them onto pattern paper, pin the pieces to the fabric, and cut both the paper and the fabric together, by all means this works too.)

Cut list: (You should end up with...)
Balloon:
(2) pieces of  #6 Balloon Stripe (C)  (they should be mirror images of each other.)
(2) pieces of #7 Balloon Stripe (B)  (they should be mirror images of each other.)
(2) pieces of #8 Balloon Stripe (A)  (they should be mirror images of each other.)
(1) piece of  #9 Middle Balloon

Sky:
(2) pieces of #5 Sky (D)  (they should be mirror images of each other.)
(1) piece of  #4 Sky (E) (cut this piece on the fold)
(2) pieces of #2 Sky (F) (they should be mirror images of each other.)
(1) piece of Sky (G) (there is no pattern piece #1; this is number one) that measures 3 1/2" X 17"

Basket:
(3) pieces of #3 Basket (cut this piece on the fold)

Ropes:
(4) 1" X 8" rectangles

Pillow Back:
(2) 17" X 11 3/4" (I chose to use the basket fabric for this one.)

Sew the Balloon
(Use a 1/2" seam allowances through out the project.)

4. Lay the #9 Middle Balloon piece right side up. Overlay the right hand side #8 Balloon Stripe (A), wrong side up.

DSC_1316
DSC_1317
Align the raw edges on the right side, match center marks and pin at the center. Match each raw end and pin. **This is where things can get a little tricky sewing curves. This is my tip for pinning angled seams so that the edges match up when everything is sewn together...which is critical for this project.**


MarkingSeamAllowance
HINT: Measure and mark the 1/2" seam allowance on both pieces at the beginning and end of the seam. The picture above is the end of the seam on piece #9 and on right hand #8.


DSC_1322
Match the marks and pin the layers in place. These marks are where the thread should sew through allowing the pieces to open in alignment.


DSC_1323  
This is the piece flipped over. Notice that there is that triangle that sticks out. This is good. The measured seam allowance mark tells you how large a triangle should be there. Start sewing in the crotch of the beginning "V" and finish sewing in the crotch of the other "V". 


DSC_1327 DSC_1329
Open the piece, make sure the top and bottom raw edges are aligned, close the piece, press the seam to one side, and trim the extra triangles flush with the rest of the piece. Presto, perfectly aligned edges, with an angled seam. 

DSC_1328
So, back to the matched #9 Middle Balloon and right hand side #8 Balloon Stripe (A) pieces...Start sewing in the crotch of the "V" and continue through to the other "V". (You don't need to back stitch here, like in quilt patchwork, because the beginning and end of the thread will get caught up in subsequent seams.) Open the piece and make sure the top and the bottom of the piece are parallel.

DSC_1332
Close the piece, trim the seam allowance to 1/4", snip small cuts into the seam allowance where the fabric is curved so that both pieces will lay flat when open. Open the piece and press the seam to one side with a hot iron. The fabric will probably naturally want to go toward the #9 Middle Balloon piece.

5. Repeat this process with the left side of the #9 Middle Balloon piece and the left hand side #8 Balloon Strip (A) piece.

6. Now repeat this process with the remaining balloon pieces, first #7 then #6, in order. When you have finished the Balloon portion, it should look like this...

DSC_1339
**As the curves become sharper, that is, less like straight lines, the stitching tends to get more sensitive. If you aren't careful, puckers, folds, and miss-alignments can occur. Here are my tips for how to sew nice curved seams that stay flat.** (In all honesty, these tips are probably already out there on the Internet somewhere, but these ones are just the ones that happened to help me most.)

HINT
*Go slow. Stitch slowly. Leave your needle down through the fabric, pause, lift the presser foot and check both layers of fabric to make sure that they are flat within the seam allowance. Lower the presser foot and continue on.
*Pin the middle, the beginning, and the end. One layer is curved one way. The other layer of fabric is curved the other way. The one that looks like it has a bite taken out of it, or the one that is concave, is the one that "seems" shorter. This layer needs to stretch to "meet" the other fabric Don't put too many pins in, because you want to be able to work with this stretchy bias-cut fabric. Gently, and evenly, stretch the concave piece to meet the edge of the other curve (or the convex piece). Match the edges together with your fingers and gently guide them slowly through the machine. 
*Work to aim for those "V" crotches. This will align the edges once the pieces are opened.
*Don't bother back stitching at the beginning or the end. If you don't like the seam at the end it is easy to rip it out and start over. 
*Clip perpendicular to the seam within the seam allowance along the curves to let the seam allowances lay flat behind the piece.

Sew the Ropes
DSC_1355
7. Fold one rectangle in half lengthwise, wrong sides together, and press with a hot iron. (Second mock-up from the left.) Unfold this and fold each raw edge to meet the center crease and press. (Third mock-up from the left.) Fold the piece in half again lengthwise and press. (Mock up at the far right.) Repeat with the remaining three rectangles and then set these aside.

Sew the Sky - Part 1
That sounds kind of funny. And by the way, my sky is pink.

DSC_1347
8. Lay the #4 Sky (E) piece right side up, and overlay the right hand side #5 Sky (D) matching the dots. Sew them together with a 1/2" seam allowance. Trim the seam allowance to 1/4" and press the seam toward the #5 piece. Repeat with the left hand side #5 Sky (D) piece. (Yes, you can see the seam allowance, but this will be rectified once this sky piece is stitched to the Balloon piece. Just a note, in the photo below, the seam allowance is folded the wrong way.)

DSC_1359
9. Match one end of one rope piece with the marks at the bottom of the #4 Sky (E) piece and pin in place, making sure that the open edge is facing away from the center line. Match the top of the rope piece with the mark on the attached #5 Sky (D) piece and pin in place. Both the top and the bottom of the rope piece should extend beyond the sky pieces. Baste the rope piece in place. Repeat with the other three rope pieces, making sure that the open edges face away from the center line.

10. Edge stitch both long edges of each rope piece and remove basting stitches. Trim the rope pieces that extend beyond the sky pieces so that they are flush.

Attach the Balloon to the Ropes
11. Fold the Sky piece you just finished in half, matching left and right edges and finger press the center crease. Fold the finished Balloon piece in half, matching left and right edges and finger press this center crease. Open both pieces, overlay them with right sides together, match center creases and pin. (This is going to be just like piecing the curved balloon pieces.) Remember my "sew in the crotch of the "V" hint" and how to align the curved edges to get that "V"? Do that now, and pin matched left and right corners. Match edge markings and pin. In all, there should be five pins holding together the sky/ropes piece and the balloon piece.

Take a deep breath, and start in the center crease of the balloon and stitch out to the side each ways. Go slow. Make it even. Trim the seam allowance to 1/4" and snip the curved seam allowance of the sky piece to allow it to "stretch" and lay flat around the curve and press the seam to one side.

Stand back and admire for a moment, and congratulate yourself knowing that was the last curved seam.

Sew the Sky - Part 2
12. Lay the right hand side #2 Sky (F) piece right side up, and overlay the #3 Basket piece wrong side up. Match edges (per my hints above about the V's), pin and sew. Trim seam allowances to 1/4" and press to one side. Repeat with the left hand side #2 Sky (F) piece.

DSC_1360
13. Lay the Balloon piece right side up and overlay the just completed Sky/Basket piece over top, matching edges and pin. (When the piece is unfolded, the most left and most right ropes should align with the edge of the basket piece. It should look like the ropes attach the basket to the balloon.) Sew, trim the seam allowance to 1/4", and press toward the basket piece.

14. Lay the Balloon piece right side up and overlay the #1 Sky(G) piece wrong side up (The sky piece for which there was no pattern piece.) (When the finished piece is opened, this last sky piece should be sewn to the bottom of the basket.) Match edges, pin and sew. Trim seam allowance to 1/4" and press toward the last Sky (G) piece.

Sew the Basket

DSC_1361
15. Align the two remaining #3 Basket pieces together, right sides together and pin. Sew around the basket piece, leaving a 2" opening at the bottom of the basket, back stitching at the beginning and the end. Above, you can see the 2" opening I've marked and will not sew beyond.

DSC_1363
Trim the seam allowance to 1/4", trim the corners, and turn the piece right-side out. Use a pencil or chopstick to push out the corners and press.

DSC_1380
16. Align the basket piece atop the patchworked basket shape and pin. Edge stitch around the basket perimeter, starting 1" from the top right corner, continuing down the right side, on to the bottom, up the left side, and 1" past the top left corner. Back stitch at the beginning and the end.

DSC_1382
Pour yourself a glass of something good to drink and say "cheers" the pillow front is finished!

Finish the Pillow Back

DSC_1385
17. On one pillow back piece, along one 17" edge, stitch 1/4" from raw edge. Fold wrong sides together and press along this stitch line, pin and then edge stitch. Then fold the finished edge up to make a 1" hem, press, pin, and edge stitch again.

Repeat with other pillow back piece.

DSC_1386
18. With wrong fabric sides facing up, overlap finished edges of pillow back pieces so that the total back pillow panel should measure 17" X 17". Pin, and baste each overlaped edge within the 1/2" seam allowance.

DSC_1387
19. Lay back panel right fabric side up, and overlay the balloon patchwork panel wrong side up and pin. Stitch all the way around, back stitching at the beginning and the end. Trim corners and turn the work right side out through the opening in the back panel. Stuff the pillow case with the pillow form and insert your favorite friend into his/her new sweet hot air balloon.

  HotAirBalloonPillow2

If any of these instructions aren't clear, or if there is an error, please leave me a note! This tutorial is my first of its kind, (I have many more ideas I can't wait to share) and I've had it all running around and around in my head. I hope that everything came out correctly, but with a teething infant, and my sever lack of sleep, I can't be too sure. Thanks!

Baby Bunny Stencil - Free Download

Monday, March 12, 2012

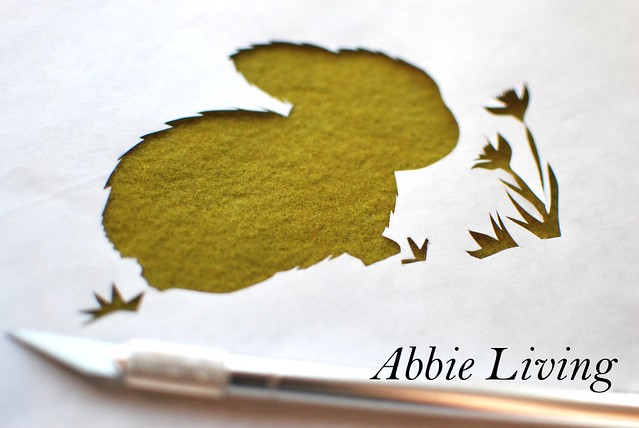
BunnyStencilPattern1
This weekend was a whirl wind of crafting, drafting, and computer complications. It was busy inside and beautiful weather outside. I wished I had spent more time enjoying the weather, but when my mind is able, and the kids are otherwise occupied, there is no stopping these crafting fingers.

Working hard on this blog, this creating, building these tutorials is a new intentional commitment for me. I've been blogging for a few years now. Sometimes with fervor and exuberance and sometimes not. The need to express my creative side, connect with others, and build a new revenue stream for our family are the currents that pushed my blogging hobby along. I know that the act of creating, and the discipline to keep creating, can lead to some of the goals I'd love to achieve in the this lifetime. All these thoughts and feelings have led me to the brink of choosing to a path. But fear is holding me back from stepping off and committing.

Lately I've been praying a lot and asking for guidance. Which way should I go? How much should I be concentrating on my family? How much should I be concentrating on my creative talents? What should I be giving and how much? What is it that I am meant to do?

I was reading this passage in the Catholic Herald today and it really hit home for me. In her March 8-14, 2012 Opinion piece, Elizabeth Foss wrote, "St. Isaac of Stella wrote, 'If you desire to know yourself and possess yourself, go into yourself, and do not search for yourself outside. Distinguish between what is around you, what belongs to you, and yourself! Return then, transgressor, to your heart within, where you are truly yourself.' So much of what we believe about ourselves and the way we see ourselves is a reflection of the interactions we have with other people. Moment after moment, day after day, we store up a lifetime of impressions from without. The opinions and the attitudes of other people can shape us, nearly to our very core.

But those impressions cannot touch the innermost reality of who we are. It is only the Holy Spirit in whose likeness we are created who can truly shine a light on who we are intended by our Creator to be, who we become if we are fully united to Christ. A quiet intimacy with God is the truest way to know ourselves."

Many things I've been reading lately are subtly pointing me to this creative outlet, this blog. I love creating new things. I adore working with my hands and designing. God has a funny way giving me tiny hints and pointing me in the right direction just when I think I can't stand it any longer to not know.

I very much enjoy working on these posts and sharing my creative work with others. I hope that you also enjoy what I am posting here and it is useful for you. Stay tuned for more soon!

BunnyStencil6 Today, it is just a quick post. I am working on something a bit more complex for later this week.

BunnyStencil2
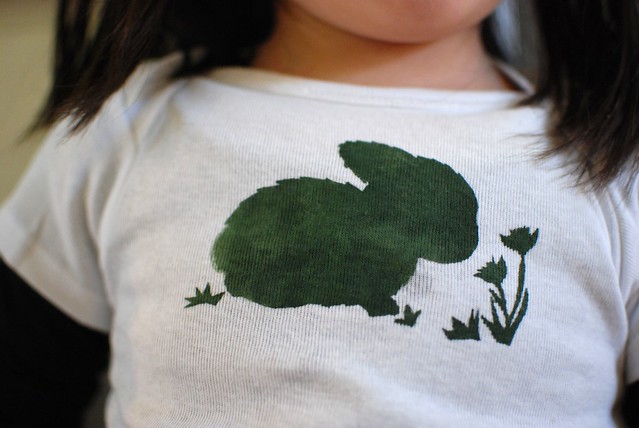
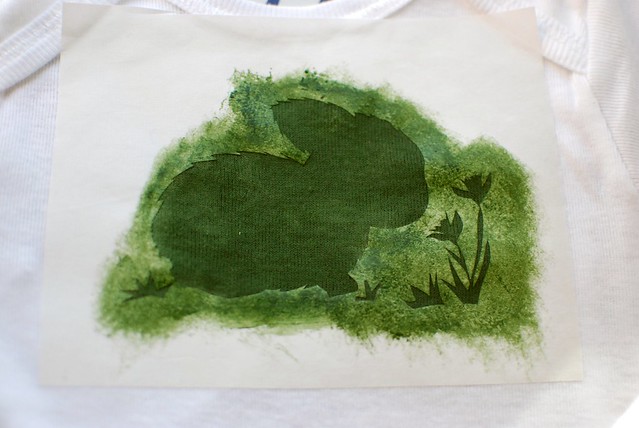
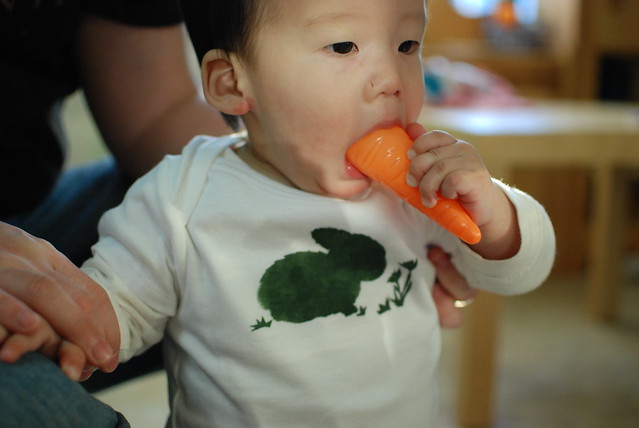
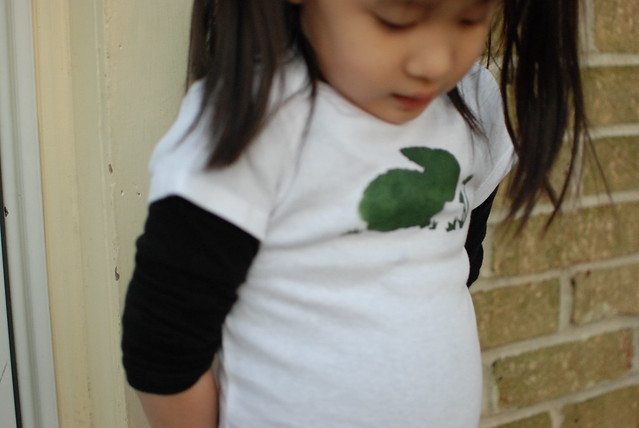
This is the a little baby bunny stencil pattern. Downloadable here. Click here for the tutorial about how to create a sweet stenciled little baby tee..

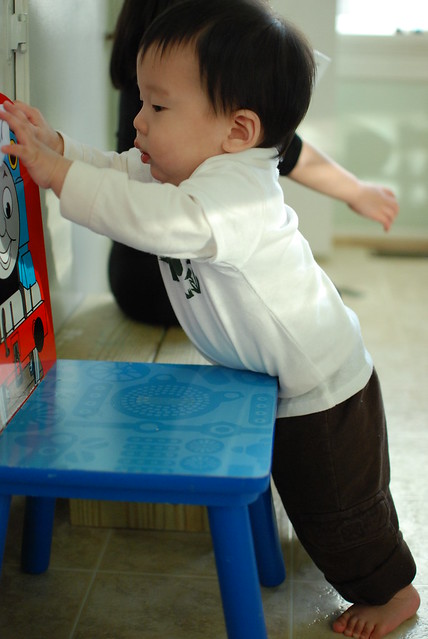
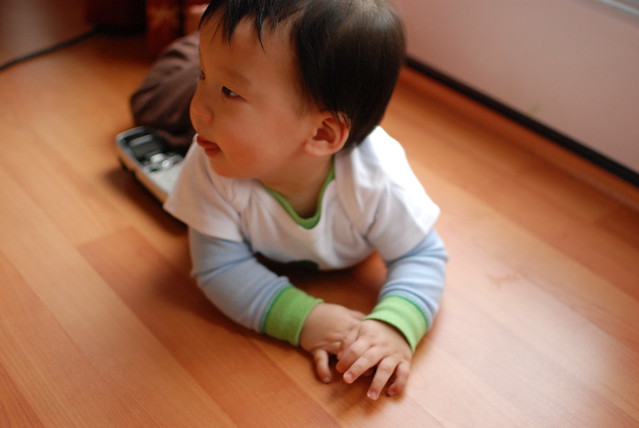
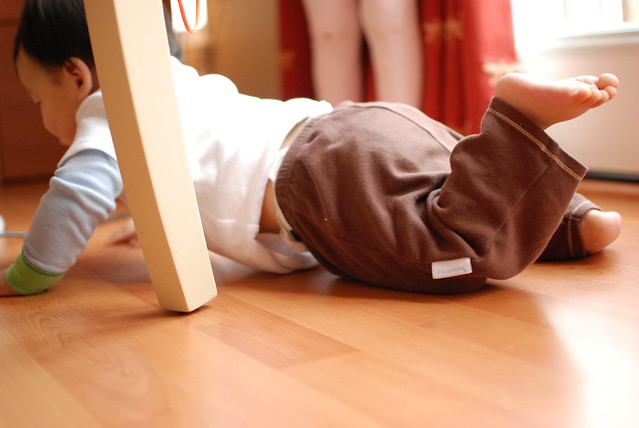
I couldn't for the life of me get a good shot of the finished tee. This crawling baby can cruise at 9 months!! Yikes. And my 4 year old is a little shy about modeling. *sigh* So these funny ones are the ones I get.

BunnyStencil3 BunnyStencil4 BunnyStencil5

Spring Chick Stenciled Baby Tee - Tutorial

Friday, March 9, 2012

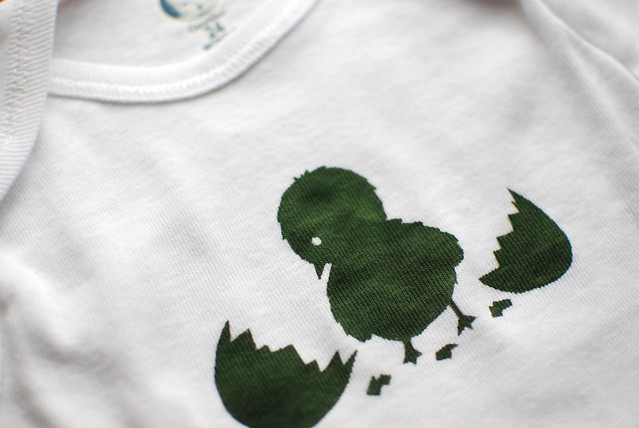
ChickTee8Cute round tummies deserve a little spring time adornment. Like say, a cute t-shirt motif that when stretched in the horizontal direction becomes even more cute.

Spring time is on my mind as winter wanes in these parts. Tornadoes in the mid-west, and 70 degree weather here has me wondering what happened to the snowy days of winters past. Lent is here and it is a time for reflection, prayer and penance inside this spirit of mine. I am thinking of Easter and how glad I'll be to see the end of this 40 day ritual of intense personal scrutiny. Not a season I love really. But truly I feel better at the end of it all. Refreshed. Renewed. And ready to meet what is next with hope and openness. I guess that is what Lent, and spring, are about. A new beginning.

And so, I was daydreaming of what reminds me of spring and I thought of little chicks hatching. We had that incubator when I was in grade school. The heat lamp hung low kept those little eggs warm nested in that fresh bed of piney wood shavings. My classmates and I were equally delighted when those tiny new beings finally poked their beaks through their shells and came out into our world. Wet, frumpy, matted, and perhaps not quite as round as the one I pictured above, those tiny little chicks were so very adorably cute.

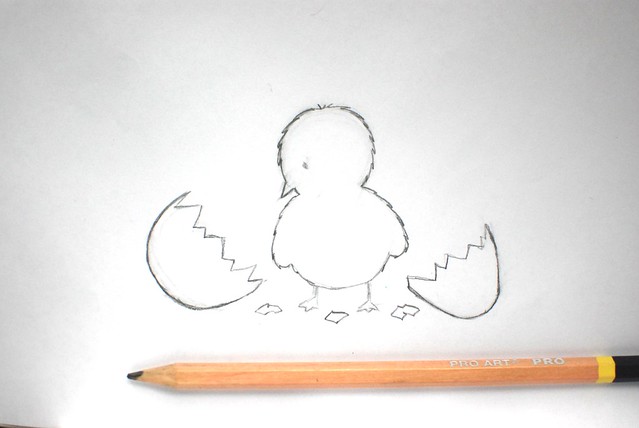
As I sat in front of the TV watching the Food Network last night, I sketched a couple of chicks. And I've uploaded my favorite draft here.

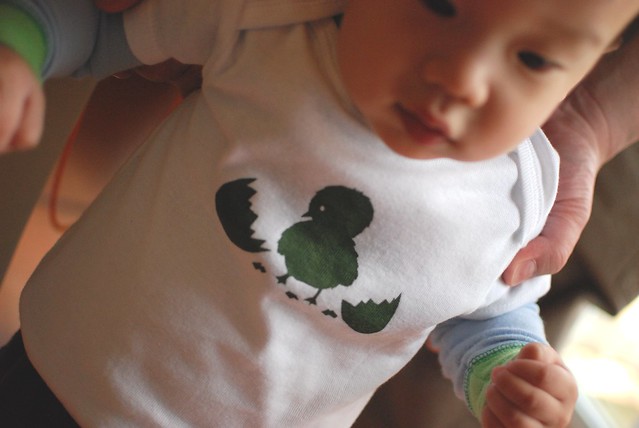
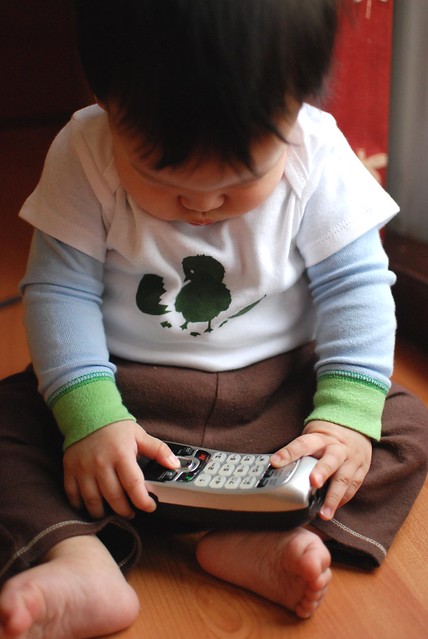
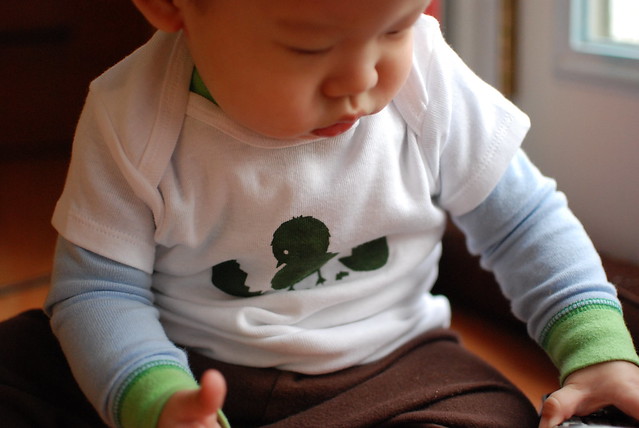
I turned the sketch into a stencil and created a baby tee for Pie Pie. In all truth, Little Miss can wear this one too with her petite stature. It is for a 24 month-old after-all. It is a bit big on Pie Pie and he kept on moving away from the shot, so these are the best modeled poses I got.

This stencil craft is super easy to create, pretty economical, and very cute. Though, maybe not as cute as the chubby baby cheeks pictured below.

ChickTee7
Materials
  • (1) Baby t-shirt (can also be a onesie, or a long-sleeved t-shirt. What ever you desire. The one pictured here is a 24 month size, but you can size yours to fit.)
  • Fabric paint (I used Folk Art Fabric Paint in #4419 Thicket)
  • Small sponge (you can use a regular stencil "brush" or a small sponge. I just took a scissors and snipped a regular dish sponge in quarters and used that.)
  • Freezer paper
  • Iron + ironing board
  • Piece of cardboard large enough to fit inside the body of the shirt
  • Pencil
  • X-acto knife + old magazine to cut on
  • Chick picture download here and scroll down
How To

ChickTee2
1. Download and print on regular computer paper this chick sketch. Yes, it is for you, and it's for free.

ChickTee3
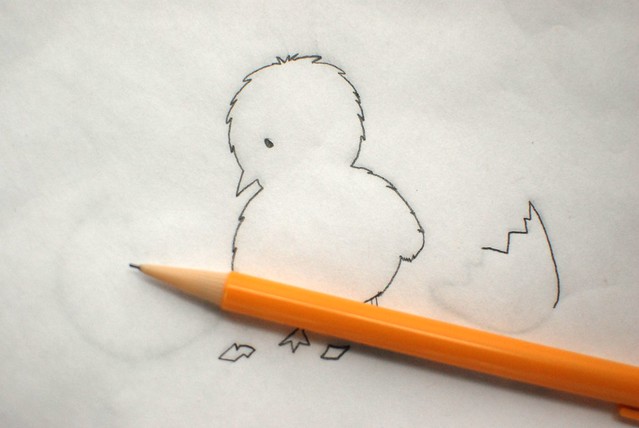
2. Overlay a piece of freezer paper on top of the sketch print and trace the image onto the paper side with a pencil. (Place freezer paper plastic side down on the print.)

ChickTee4
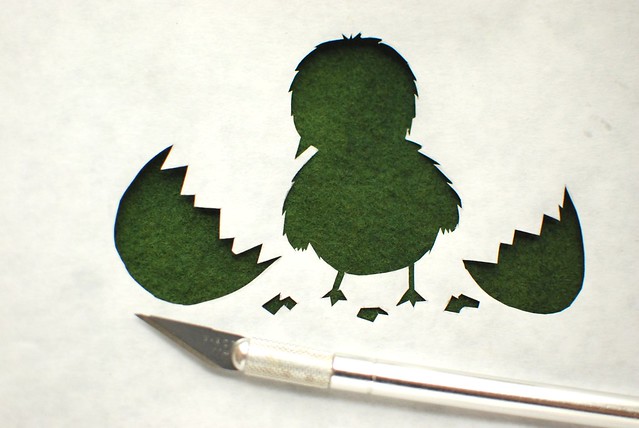
3. Place freezer paper on top of the old magazine and with an X-acto knife cut out the image along the traced lines. Go slow and pay attention to detail. After, erase the extra pencil lines.

ChickTee5
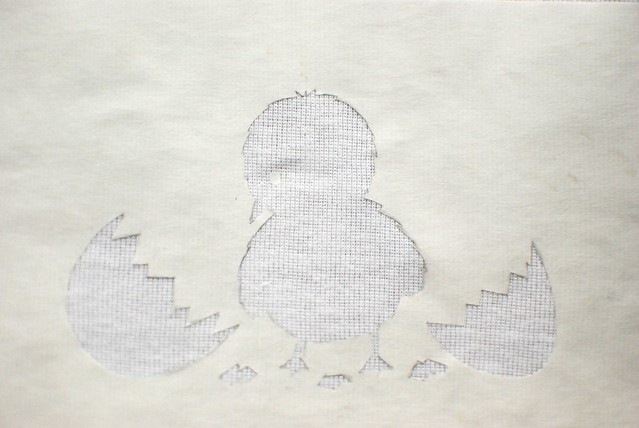
4. Place a piece of cardboard inside the body of the shirt. Insert the cardboard from the waist end and make sure the cardboard is wide enough to stretch the fabric of the shirt horizontally just slightly. With a hot dry iron (I set mine on the polyester setting and turned off the steam) iron the freezer paper onto the front of the shirt. Pay particular attention to the edges and make sure these are firmly ironed on. If you'd like, cut a very small circle of freezer paper and iron this on to the shirt to place the eye of the chick.

ChickTeeB
5. With a just damp sponge (not wet here), apply the fabric paint to the t-shirt through the stencil. Dab the sponge in the paint and then dab the t-shirt fabric firmly to push the paint into the fabric. Make sure that the entire surface is covered. Do not remove the freezer paper stencil and set the shirt aside to dry completely.

ChickTee6
6. When the paint is dry, carefully remove the paper stencil and set the fabric paint according to the directions on the bottle. Put the tee on your little guy or gal, and start trying to snap those photos!

Outtakes

DSC_0498
Can't see the front of the shirt!

DSC_0504
Really can't see the front of the shirt.

DSC_0514
Okay, can't even see the model now. Photo shoot, that's a wrap.

Inspiration
The Snooty Bird Walk by Vintage Green Creations
Goody Bags for Spring Chickens by Country Living
Related Posts Plugin for WordPress, Blogger...
Blog contents © Abbie Giving 2010. Blogger Theme by Nymphont.