Showing posts with label embroidery. Show all posts

A Big Thanks for Your Tote Bag Sewing Help

Tuesday, October 16, 2012


I am so overwhelmed by the positive responses and promises of help I've gotten for the Giving Bag collection. Thank you to all who are sewing, embroidering, and collecting out there! My goal is to collect 200 tote bags for The Giving Heart charity in Richmond, Virginia and I've already received my first few in the mail! Thank you! The bags pictured above are ones I made of duck cloth canvas and are waiting for children to decorate them!

If you are interested in donating, go here to find out more. Here are a couple of the mentions I've found around town! (If you've blogged about this donation drive, send me a note at abbieipark(at)gmail(dot)com.  I'd love to hear from you!)


stitch&send
Mollie Johansen - Wild Olive and new patterns here too!

The Choate Family Blog posted great pictures of the girls sewing!


Leslie - Leslie's Art and Sew

Make and give to others more than you yourself would like to receive.

Links I'm Loving :: Giving Thanks and Stitch and Send

Wednesday, October 10, 2012


This weekend a little sand, ocean, Christopher Columbus, a muscle car show and drag racing the lights until 2 am, OC Maryland, family time with grandparents, a little unplugged time, end of season Maryland blue crabs, and then returning to a crashed laptop, a skin rash, and a head cold...so are the ups and downs of this ride called life. 

Coming up soon, some progress news on The Giving Heart bag collection, other crafting for charity ideas, and that fabric printing how-to I promised. My, so much to do! Hope you are moving right along too!

Here are some of the links I'm loving...


As I am starting to feel harried by our carpool schedule and the bits at home, school, and a head cold...I wonder if this would be the best stress remedy for it all...

Wild Olive designed some great simple embroidery patterns for the Stitch and Send project for charity! Stitch a simple embroidery patch, and send it to me to be affixed to a tote bag for The Giving Heart charity of Richmond, VA.

I have fallen in love with these 2012 Christmas wall art pieces by between You and Me! Head on over to their Etsy store for more information.

I Love You Jesus :: Free Embroidery Pattern

Thursday, September 20, 2012


Just like the Love Falling embroidery pattern, the idea for this pattern popped into my head suddenly last week. 

I get ideas like that. They kind of sneak up on me and pop out when I am in the shower, or on the toilet, or taking something out of the oven while fending off a 16 month old who is precariously leaning on my left leg. In other words, these epiphanies like to peek out and say "hello" when I simply don't have a pencil and a slip of paper on which to capture them before they disappear into the oblivion of my foggy-mom-brain. Never to be seen or heard from again. Ever. It's sad really. Sometimes I believe that some of my greatest artistic moments slip by unaccounted for and drop off the cliff into the valley of great-ideas-that-were-never-to-be-had.

But I digress lamenting about my memory that functions like a sieve. This pattern, the I Love Jesus pattern, I took the liberty of adding some color. Mollie of Wild Olive just blogged a week of fabulous embroidery tinting ideas. You should visit for just a while to look at all her colorful photography. *It makes you want a new set of crayons.* Thank you Mollie!


So, you can tint the clouds, leave them white, or fill them with another such stitch. Fill the crosses, or not. I like them looking heavy. And the red lettering, well you certainly don't have to keep it red. Do what comes to you.


If you are so inclined, please consider stitching up one of these patterns on your next tote bag and donate it to the Giving Heart. I am gathering a goal of 200 handmade tote bags for their Thanksgiving Feast event when over 500 volunteers will be preparing supper for more than 3000 guests! Seniors, homeless individuals, and poor families receive a tote bag full of living essentials like toiletries, diapers, and non-perishable food stuffs. Please lend your time and talent and make a Giving Bag to someone in need. To find out more about my work with The Giving Heart, go here. Thank you!


Links I'm Loving :: Sewing Knitting Embroidery Praying

Tuesday, September 4, 2012

It is the calm before the storm. Today is the last day my children are in summer mode. Wake up later. Play, play, play. Watch some TV. Ask Mama for snacks...that require an oven. Little do they know that their flu shot today was just the beginning of a bright and bold future...away from home and at school. (I secretly feel a little bad for the youngest. He is going to feel like an only child home all alone with Mama 5 days a week.) 

And so, I am soaking up all the joys of the last day of my summer, before my crazy carpool schedule gets going, and before I start freaking out. What do I do on the last day of summer? Go to the doctors office. Make kids snacks in the oven. And I squeeze in a bit of sewing (wash towels for my daughter's classroom,) knitting (Christmas present for mom,) and a bit of blog reading...

Here are a few of my favorites:


Crayon Tinting

Gotta enter this giveaway by Take the Cannoli on the blog Vintage Grey (ends 9/6/12)

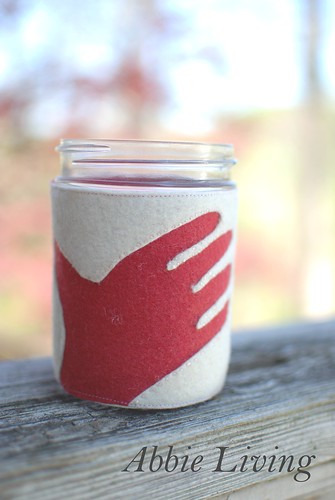
Felt Coffee Cup Sleeve

Wednesday, April 4, 2012

FeltCoffeeCuffA

I don't recall where I saw something similar to this craft I am sharing today. Someone's blog, somewhere, at some point in time...I remember their design was different for sure, but the idea of a coffee cup sleeve for a mason jar is unabashedly the same. So if you are that blogger, and I gleaned that idea from you, please do drop me a note, so that I might acknowledge your wisdom here.

Hands. I believe they are for doing, for learning, and for creating. I feel blessed, and lucky, to possess two that work well. Each day I try to do as much with them as I can in anticipation of the time that they tire and will want to work no more.

What is more amazing to me is how baby hands develop. Fat fingers start out slow and clumsy. Aiming and grasping are tiresome and challenging tasks. Accuracy and firmness of grasp aren't yet refined. The delicate is smooshed. The thin is impossible to lift. And then fingers and hands learn. They get stronger, agile, and adventurous.

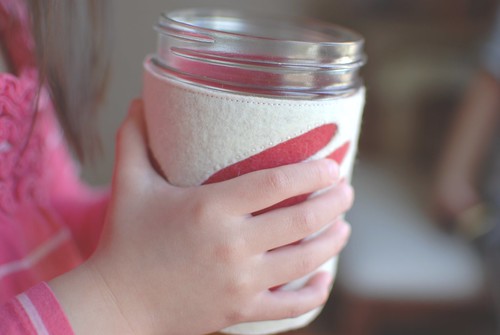
Hands and fingers are personifications of personality I believe. My mother's family all had the same hands. They all looked the alike. To this day, I have to think twice when I call my Aunt and just be sure I am not calling my mother. I look at my boys and they have sturdy hands, with wide fingers and broad palms. My little girl has delicate hands, with long slender fingers. And her hands are the perfect size to hold these mason jars.

FeltCoffeeCuff8

This sleeve pattern fits a 16 oz, pint sized, wide mouth mason jar. I tested this sleeve around the thick glass mason jar filled with boiling water and the felt fabric aptly insulated my tender fingers and the glass proudly withstood the high temperature.

Materials
  • Felt in two contrasting colors (I used 100% wool felt found here. The regular craft store poly-blend will do just fine too, or you can use a felted wool sweater deconstructed.)
  • Cotton embroidery thread in complementary color (I used regular DMC floss in ECRU)
  • Paper scissors
  • Fabric scissors
  • Pen
  • A simple sewing needle
  • Sewing machine and matching thread is optional
  • Printed Felt Coffee Cup Sleeve Pattern (download here)
  • Wide mouth mason jar--16 oz size 
How To

1. Download and print out Felt Coffee Cup Sleeve pattern.

FeltCoffeeCuff1 FeltCoffeeCuff2
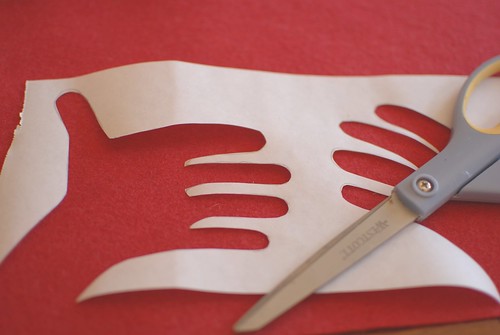
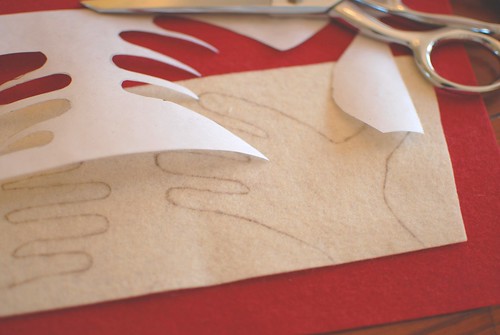
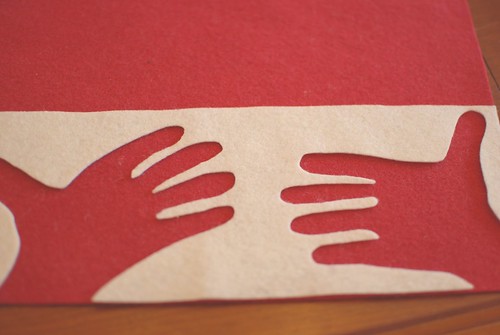
2. Cut out the pattern along solid lines with a paper scissors. Lay the pattern on the felt fabric color that will be on top and cut away. Trace the hand cut-outs with a pen.

FeltCoffeeCuff3
3. Cut the top felt fabric along the pen lines with a fabric scissors. You can turn over the cut out fabric if there is still pen lines that show.

4. Lay pattern on the felt fabric color that will be the bottom layer and will show through. (In this case the red felt.) Trace around the perimeter of the pattern and cut it out. This second felt piece should be almost rectangle and solid.

5. Overlay the layers of felt fabric and begin stitching. (The layer with the cut outs should top the rectangle solid layer.)

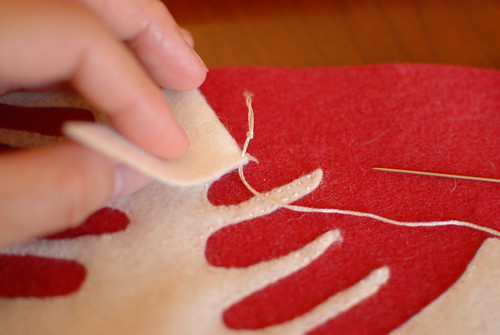
6. Use a running stitch and stitch around the felt cut outs.

FeltCoffeeCuff4FeltCoffeeCuff5
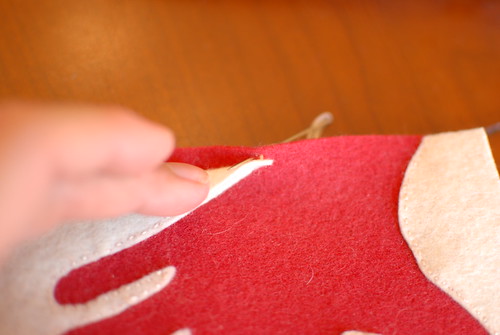
Note: I hid my beginning and ending knots between the layers of felt. Edge stitching around the perimeter of the sleeve later will hide everything nicely.

FeltCoffeeCuff6 
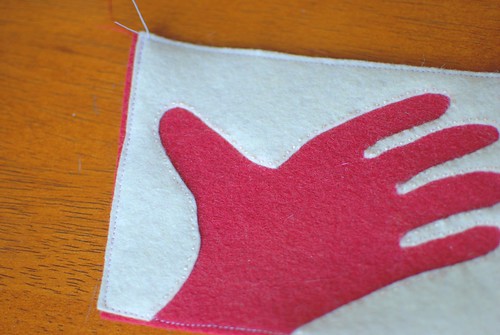
7. Stitch around the perimeter edge of the sleeve with a sewing machine, or hand stitch.

8. Pre-fit the sleeve around the mason jar and make sure the edges come together. (If there is a small gap don't worry, the felt will stretch a bit and the edges will come together.) Whip stitch the edges together with embroidery floss so that they lay flush, without overlapping.

9. Now brew your favorite cup of coffee, or tea in my case, slip the sleeve around the mason jar and pour yourself a cup and enjoy.

Outtakes:
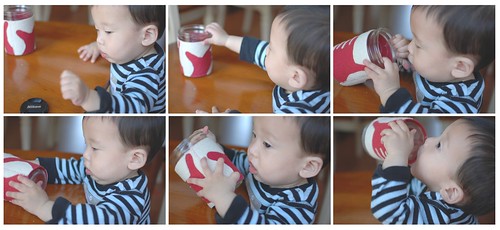
This is what happened during our first shoot...little fat adventurous baby hands happened...
FeltCoffeeCuffExtras

Stitch Swap by Wild Olive

Thursday, March 29, 2012

StitchSwap1 StitchSwapB
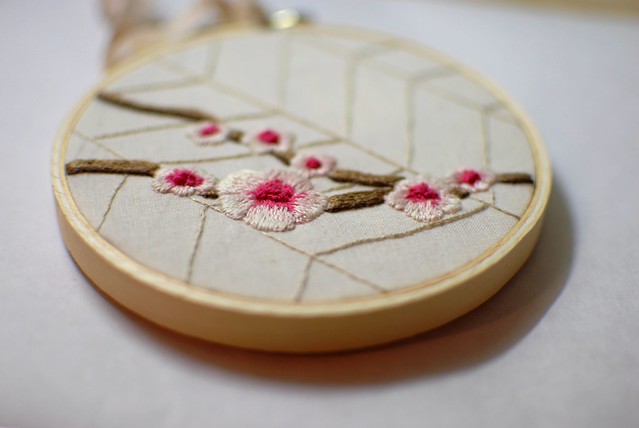
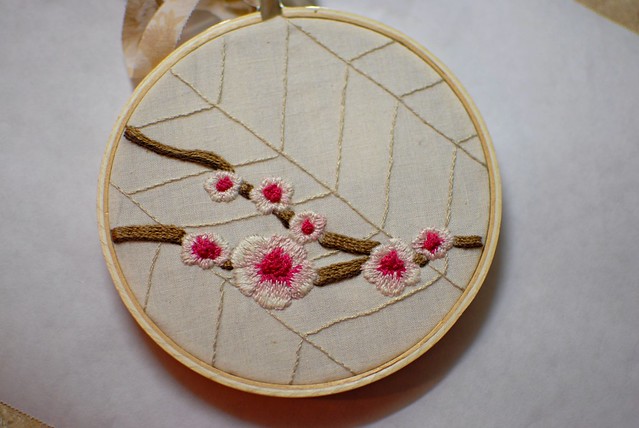
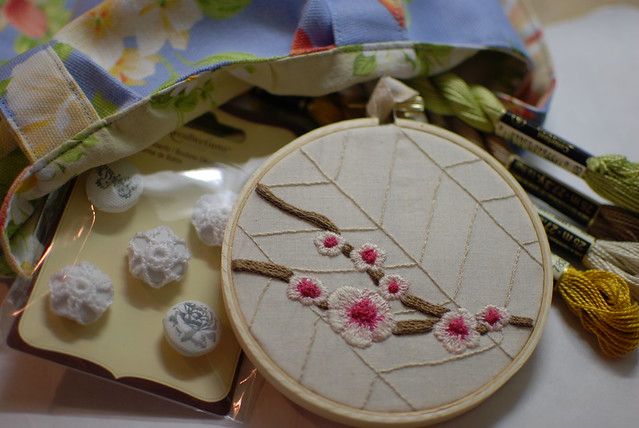
I am finally done! This little one, only 4 inches wide, is for Wild Olive's Stitch Swap!


This is my own design...cherry blossoms on branches. Living in the Washington D.C. area, I couldn't resist doing cherry blossoms. I've never actually been to the cherry blossom festival down by the river, and I think I might be very allergic to these little guys. But I love the pictures the papers and magazines come out with each year. The pinks and brown combo is one of my color palette favorites.

I did a lot of Internet research for this one, but I didn't find too many embroidery designs with filled petals. Lots of outlining, which I guess is kind of what embroidery is mostly about. But I wanted some pop, some color, and with the help of this wonderful, gorgeous, fantastic site, Needle N' Thread, I managed to do a beginner job at some shading. It came out "okay" in my opinion. Yeah, pretty good for a beginner.

StitchSwapC
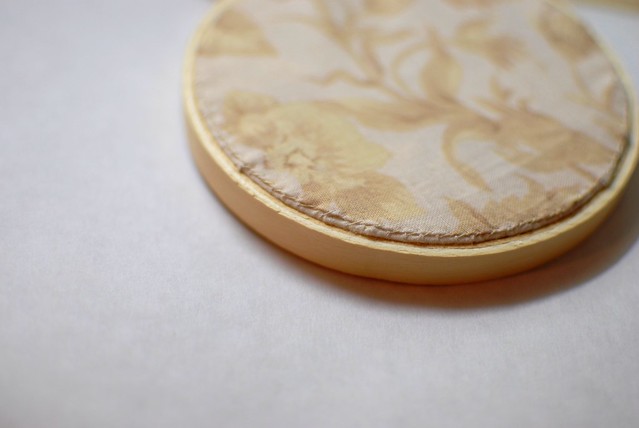
The back. Finished.

...and a few more fun tid-bits to tuck in that package to my secret recipient. I hope she likes it!
DSC_0954

If you are interested, here is the Flickr link to the other stitch swaps everyone else in the group put together. They are really cute!

Molli from the blog, Wild Olive, is the host of this wonderful endeavor, and she hinted that there will be another embroidery swap in the fall this year! So if you are interested, stay tuned to her blog!
Related Posts Plugin for WordPress, Blogger...
Blog contents © Abbie Giving 2010. Blogger Theme by Nymphont.