
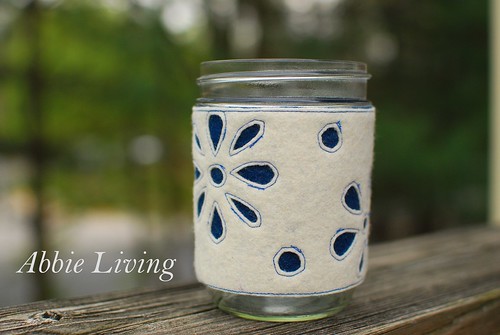
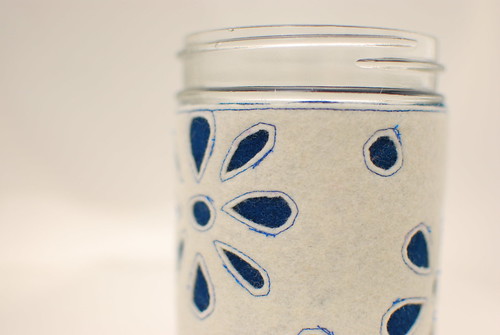
This flower pattern was actually the primary inspiration for this felt coffee cup sleeve run. After finishing a simpler pattern, I decided to give this original, more complicated, flower petal pattern another go. Reverse applique is sometimes a little tricky. But since we are in the spring season, and flowers are coming out all over to greet us, and allergy symptoms are flaring up, I felt this tea-time sleeve is still worth a go.
Last week a stumbled upon a wonderful embroidery technique called Sashiko. It is a Japanese quilting stitch actually and I've seen, and fallen in love with, all kinds of crafts that showcase this wonderful design style. I've even tried stitching a couple of designs myself. But to get that stitch length just right is harder than you might think. And so, instead of stitching a Sashiko coffee cup sleeve, I created this flower design in the same colors as those beautiful traditional Sashiko designs. Navy and white of course. After all, I would suspect, not being Japanese myself, that there might be more tea drinking in Japan than coffee anyway.

- Felt in two contrasting colors (This is 100% wool felt I found here. A poly blend wool would suffice as well.)
- Printed Blue Flower Coffee Cup Sleeve pattern (download here)
- X-acto knife and thick magazine to cut on
- Disappearing ink pen
- Sewing machine
- Coordinating thread
- Fabric scissors (a very small pair would be helpful to cut out the flower petals.)
- Sewing needle - for hand sewing
- Wide mouth mason jar, 16 oz size
How To
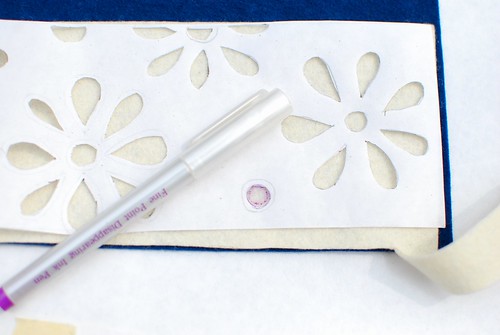
2. Transfer pattern to felt fabric top layer. I chose white as my top layer. I also chose to cut out the petals around the solid lines with an X-acto knife and then trace inside the cut outs onto the white felt with a disappearing ink pen. If you have another method of pattern transfer, please feel free to use it.
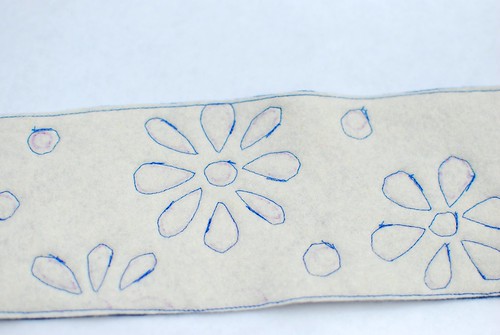
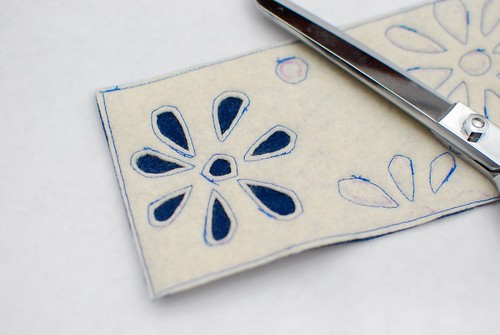
3. Machine stitch around patterned lines and around the entire perimeter of the sleeve, back-stitching at the end. (Start stitching at the center of the pattern to keep the felt pieces straight. Cut the threads close to the fabric each time you finish a petal. This way, they don't pull the felt out of whack by "stringing" the thread between the petals, and the "tails" don't get caught in the next seam.) Your petal seams need not be perfect. Don't worry. I did worry and then I told myself to stop worrying and it all came out looking great anyway.
5. Fit the sleeve around the mason jar and whip stitch the edges together by hand so that they lay flush and do not overlap.
6. Put your water on to boil and take out your tea leaves. Pour, dunk, and brew yourself a nice cup of tea to enjoy useing your new blue flower coffee/tea cup sleeve.
 Hello, I am glad you came. Abbie Living is the place where I share my sewing, knitting, and crafting projects and most importantly, share my passion for helping others in need.


1 comments:
Oh, what a lovely piece!I love the reverse look of it. So pretty! Thanks so much for sharing the idea with us! :)
Post a Comment